USSRPhoto.com

Forums / Collectors and Users Open Forum

Early Jupiter 8 for Zorki with 2 screws on back

7 posts in this thread
Reply with Quote Edit Topic Delete Topic
Hello to all,

I think you all know the early Jupiter 8 for Zorki. It has a double helix for focussing and is really hard to diassemble and reassemble. Normally there is only one screw on the mount side, but I have found one that has two screws. I have never seen one before.

Take a look:


And that are all the parts inside of it:


I think I will make an instruction how to dis- and reassemble it without problems. I have found a way that makes it easy.

Ulrich

http://fotos.cconin.de
Reply with Quote Edit Reply Delete Reply
Hi Ulrich!

I think that the very early Jup 8 have these two screws. My s/n 5005810 has these two screws and the two ears too, which come from the Sonnar/ZK.

Of course, it will be interesting to have a tutorial about the disassembling of this lens. Smile

Amitiés. Jacques.
Reply with Quote Edit Reply Delete Reply
Ulrich, You will have my undying gratitude if you can show how to reassemble these lenses. Kisses I have four needing attention plus a Industar-22 rigid, which seems to be the same design.

Jacques, I have no problem disassembling these lenses.
But Reassembly, now that's another story Angry

Cheers
Geoff
Reply with Quote Edit Reply Delete Reply
Geoff,

yes, the rigid I-22 has the same design. The problem is, that you have to mark some positions when you disassemble it (and take photos of course). When you have disassembled lenses which you havn't marked it's a hard job to reassemble them. It took me several hours the first time to reassemble it without having marked it before...

I will show some pictures soon, maybe they give you a hint how to reassemble it even if you havn't marked it during the disassembling.

Ulrich

http://fotos.cconin.de
Reply with Quote Edit Reply Delete Reply
Thank you, Ulrich.
As I discovered, some of my lenses had been incorrectly reassembled, and sadly when I disassembled a perfectly working one to discover its secrets, I did not take photos Blush and I cannot now find my documentation for the marks I made. This lens remains in pieces Black eye

I checked my lenses and find the sole one with two screws is 5006438 with lugs, like Jacques' lens.

5107859 (my above disassembled good lens) and 5109388 (close to your number) have only one screw and are without lugs.

Cheers
Geoff
Reply with Quote Edit Reply Delete Reply

Ha ha! Right, Geoff! Re assembling is sometimes a tricky operation!
I remember one of my 1,5/5cm LTM Sonnars which had to be cleaned and relubed. No problem for the disassembling, of course. But I had not taken any precaution, and the re assembling took several hours... It was checked later by a specialist (all was fine).

So now, I take marks and photos... And generally, a lens does not want to be completely dismantled.Smile

Amitiés. Jacques.
Reply with Quote Edit Reply Delete Reply
Ok... let's have some fun Cool

Without pictures:

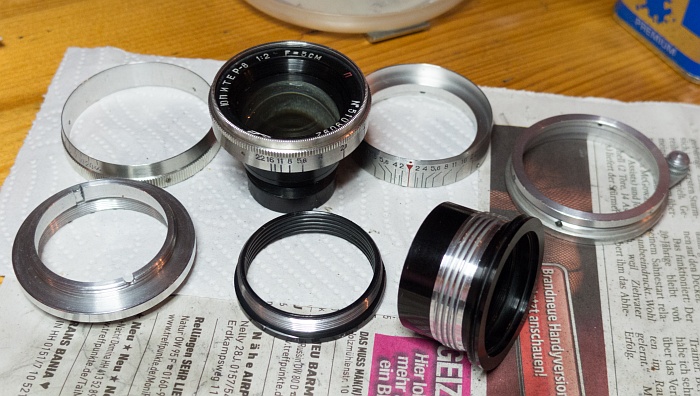
1) Remove the lens unit, unscrew it. It's easier to handle then.

2) Remove the meter scale ring by unscrewing the 3 screws.

3) Then remove the aperture scale ring.

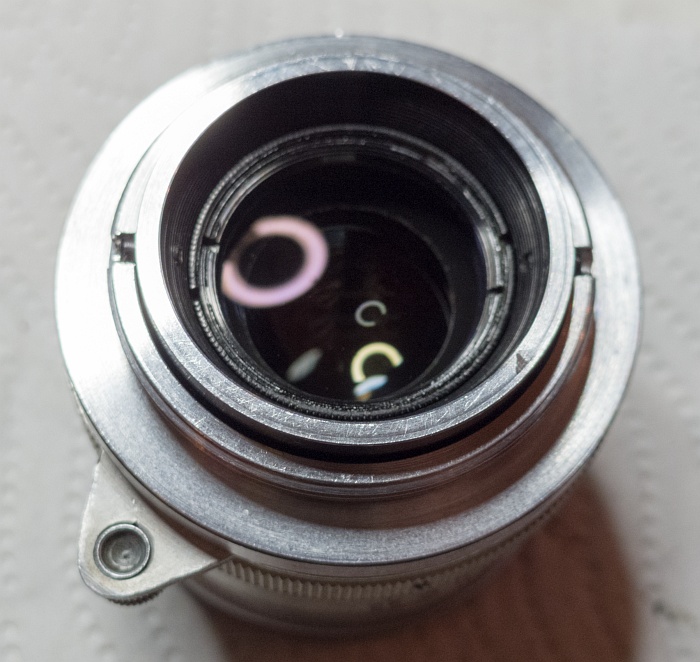
4) Set the lens to inifinity. That's the situation in this photo:


The top screw is the focus limiter screw. It's in a row with one of the black screws on bottom. I have made a mark below the bottom screw to remember which of both screws was in that position.

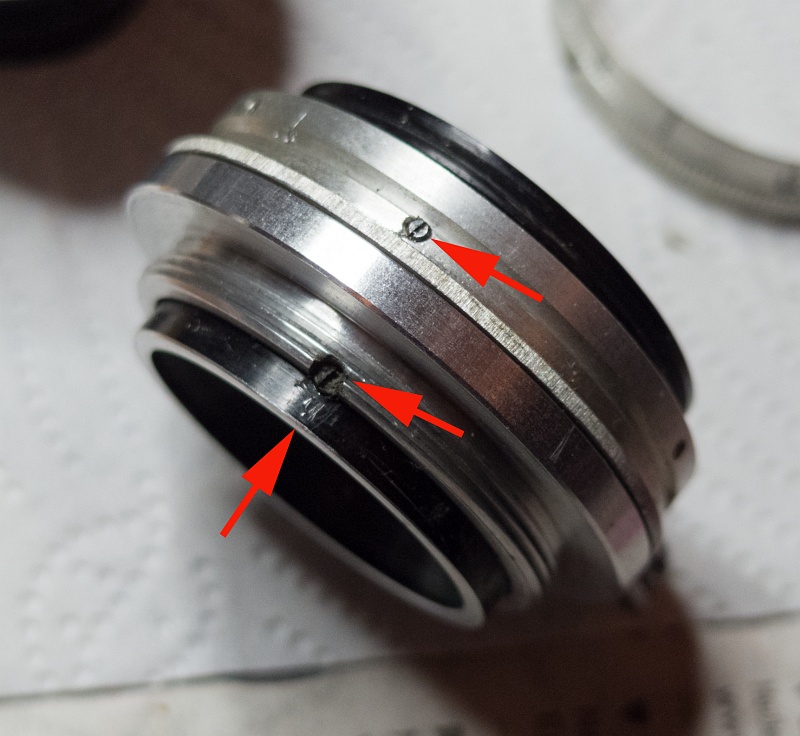
5) Remove the focus limiter screw and the 3 other screws on that ring and take the ring apart.

The situation under that ring:


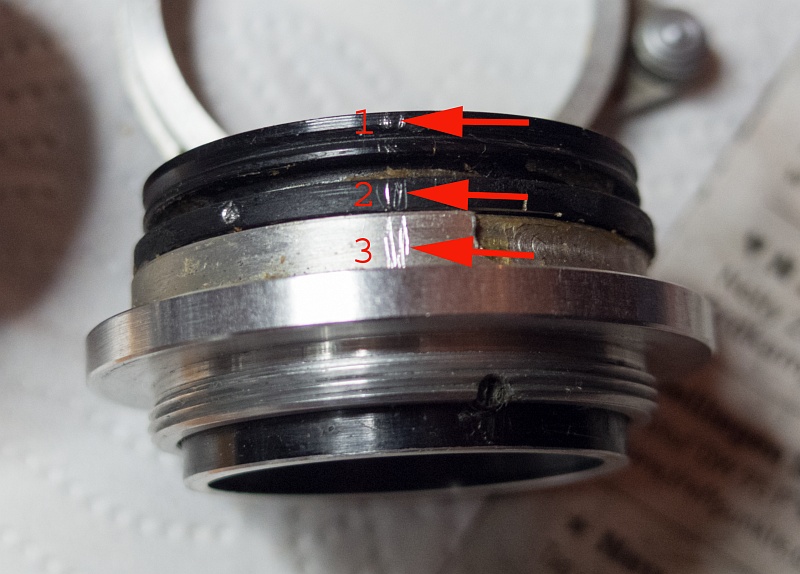
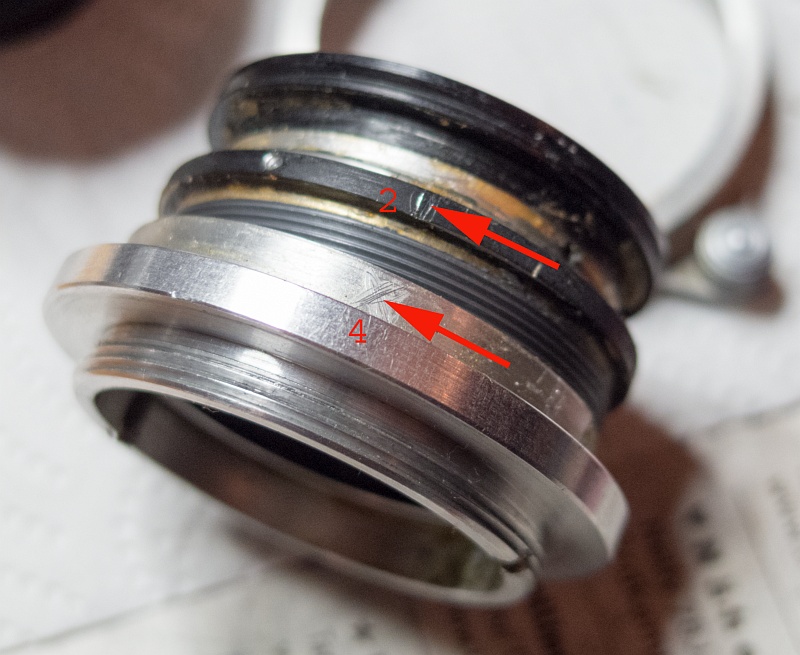
6) Make a mark over the 3 rings you see (marked as 1,2 and 3). After reassembling the lens these 3 marks must be in the position as before. If they aren't the lens was wrong reassembled.

7) Unscrew the ring in the middle (marked with 2) counter clockwise and watch how the ring marked with 1 comes apart. At the end the black screws on the bottom can get stuck a bit. Just fiddle with ring 1 so that the screws get through the slits.

The ring in the middle as it comes out of the helix. Make a mark where it comes out (4) I always use position 2 as reference so that there are not so many marks to recognise:


8) Unscrew the both black screws on bottom and unscrew the top ring. Make a mark on it where it comes out (5) in reference to position 2.


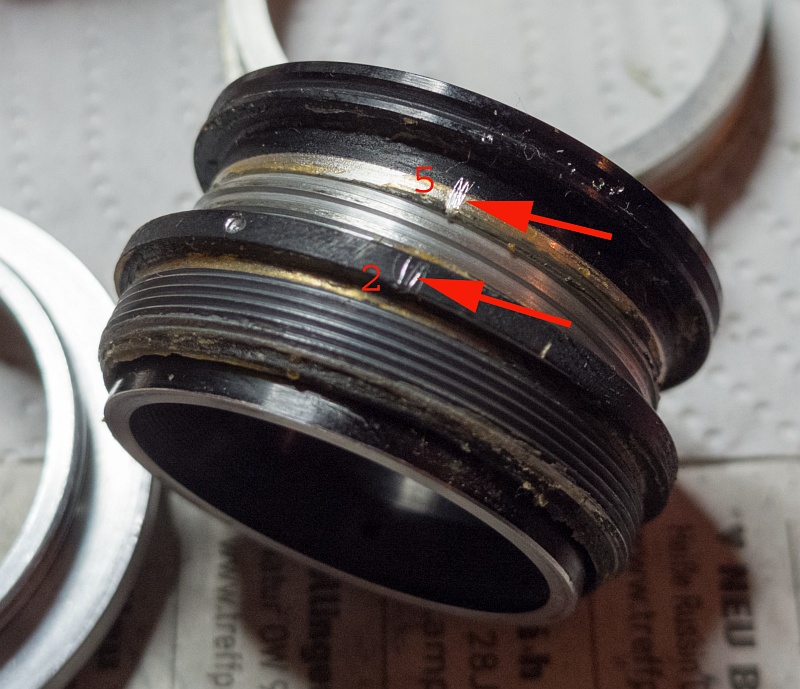
After cleaning all and relubing insert the top ring first in the middle ring until the holes for the black bottom screws are aligned with the slits. Then insert the middle ring in the bottom helix on the marked position and screw it in while holding the top ring at a fix position so that the black screws can slide into the slits. It's hard to explain but when you work on it you will see what I mean.

Good luck!

Ulrich


http://fotos.cconin.de

Reply to Topic

Forum code enabled